
Setting up PolarFire Icicle Linux in 10mins;
by 'Bayo Omotosho
PolarFire SoC Icicle Kit - Super Quick Setup Instructions
A Quick Note
This guide provides quick setup instructions for the PolarFire SoC Icicle Kit from Microchip, focusing only on Linux development.
Default firmware will be used. This is a crash-course setup — no deep explanations. If you’re curious about the “why”, Google is your friend.
Prerequisites
Hardware
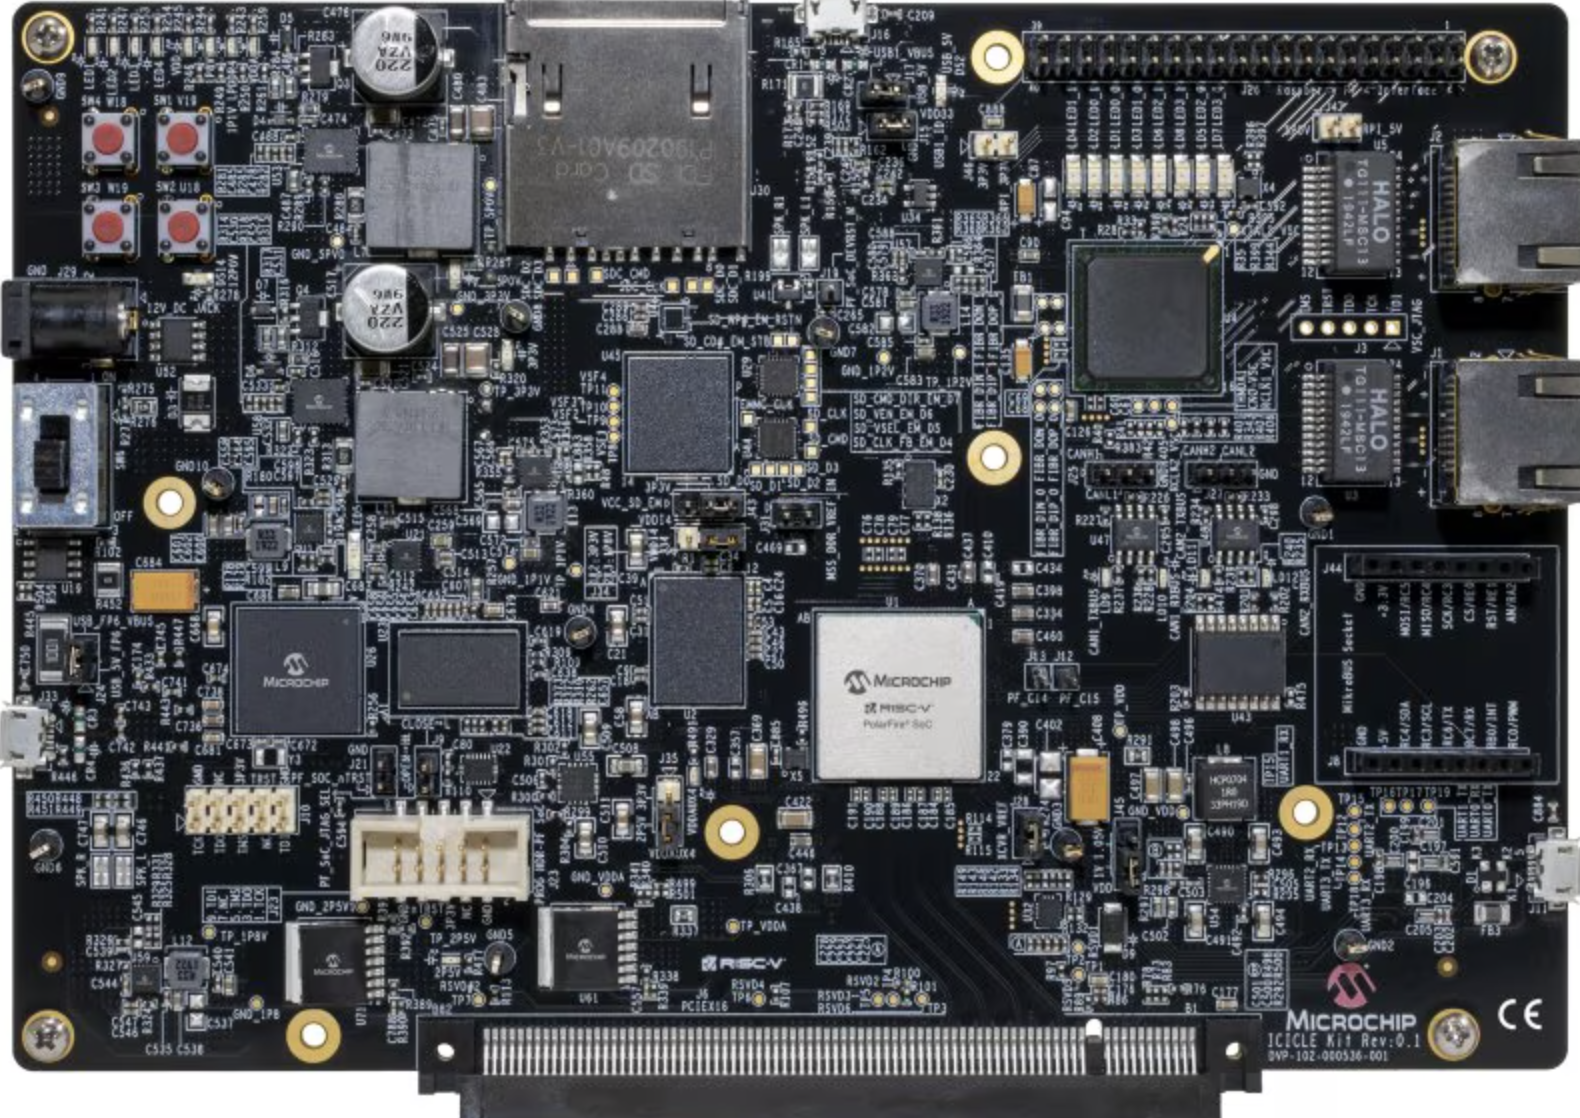
- PolarFire SoC Icicle Kit (ES)
- Micro-USB cable
- USB-to-UART cable
- SD card (16GB or larger)
- Windows Host PC
Software (on host machine)
-
PolarFire SoC MSS Configurator and Libero® SoC Design Suite 2022.3 or later
→ Get a free Silver license and install as instructed. -
Ubuntu Linux Image
→ Choose Ubuntu 24.04.2 LTS (Noble Numbat) or Ubuntu 22.04.5 LTS (Jammy Jellyfish) -
Serial Terminal App (e.g., PuTTY)
Step 1: Flash Linux to SD
- Extract the Ubuntu .img file
- Insert the SD card into your PC.
- Use Win32 Disk Imager to flash the downloaded Ubuntu image onto the SD card.
→ Select the image file and SD card drive, then click Write.
Step 2: Flash Hart Software Services + Management Subsystem Firmware to Your Board
(This step MUST done before you can use the canonical Ubuntu Image)
-
Download and extract the Icicle Kit Reference Design Programming File from:
hart-software-services GitHub Releases
→ Look for:MPFS_ICICLE_KIT_ES_2025_07.zip -
We only need Libero so that we can use the bundled FlashPro Express to program the board.
If you left everything default, FlashPro should be located at:
C:\Microchip\Libero_SoC_2025.1\Libero_SoC\Designer\bin -
Launch FlashPro Express.
-
Locate and open the
.jobfile inside the extractedMPFS_ICICLE_KIT_ES_2025_07folder.
→ That’s your firmware programming job.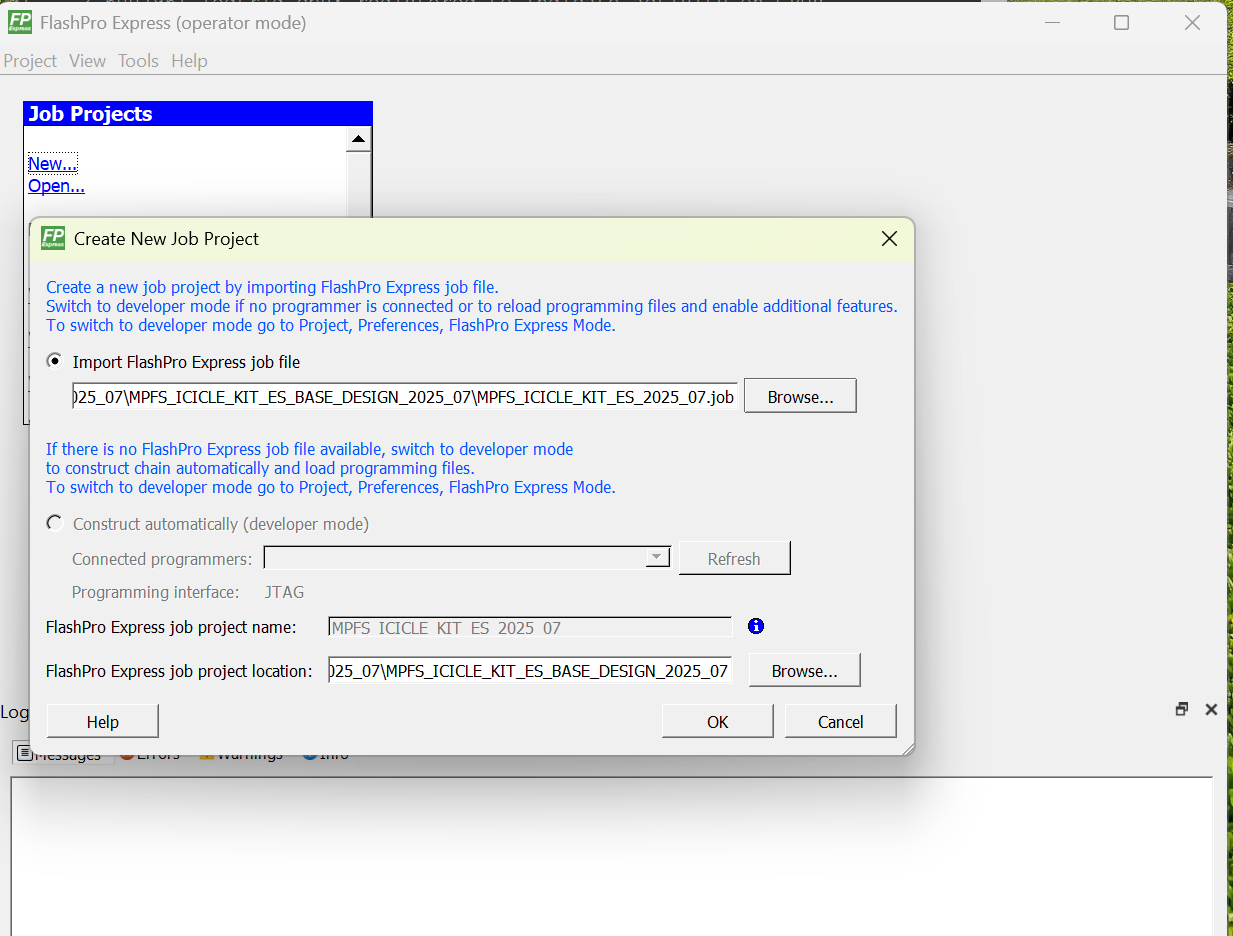
-
⚠️ Important: The Icicle Kit comes with one fewer jumper cap by default.
→ You must close jumper J9 — FlashPro will not work unless the programming pins are connected. -
Connect the USB Programming cable from J33 on the board to your PC.
-
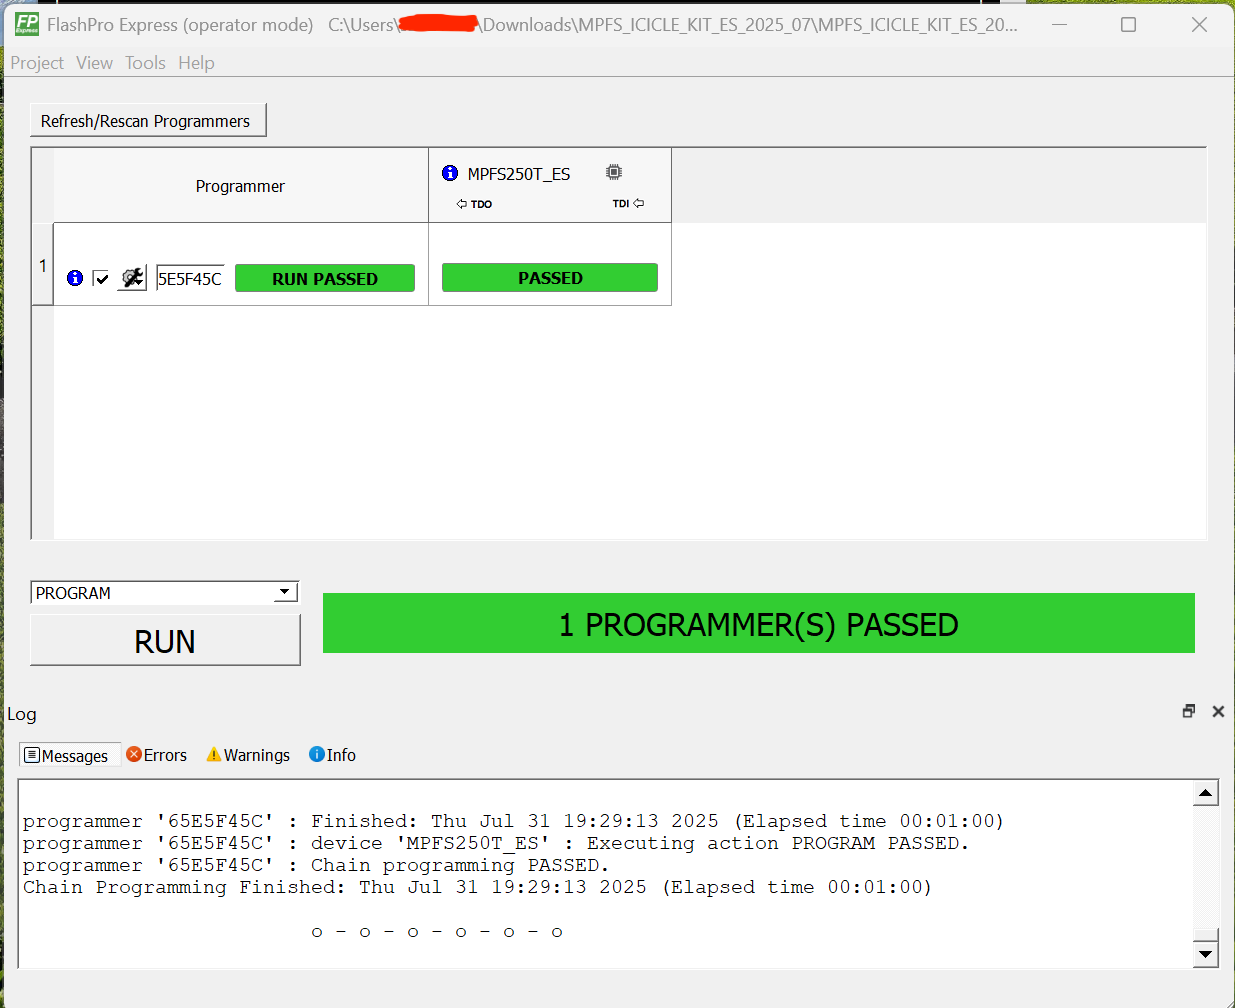
Click Program in FlashPro to write the firmware to the board.
Step 3: Power Cycle and Boot
-
Connect your Micro-USB cable from USB-to-UART J11 to your PC
-
Power off and power back on (cycle) your board.
-
Open Device Manager and find the four COM ports that appear.
-
Launch PuTTY (or another terminal app) for each COM port at 115200 baud.
-
Power cycle the board again. (optional )
→ One of the COM ports should show Ubuntu booting. -
Login when prompted. username/password: ubuntu/ubuntu
